Intuitive Keys Pro, like other IK products consists of a dedicated piano engine, and a dedicated synth engine. Both are active or available at any moment, and they work together to provide unparalleled flexility to the modern keyboardist.
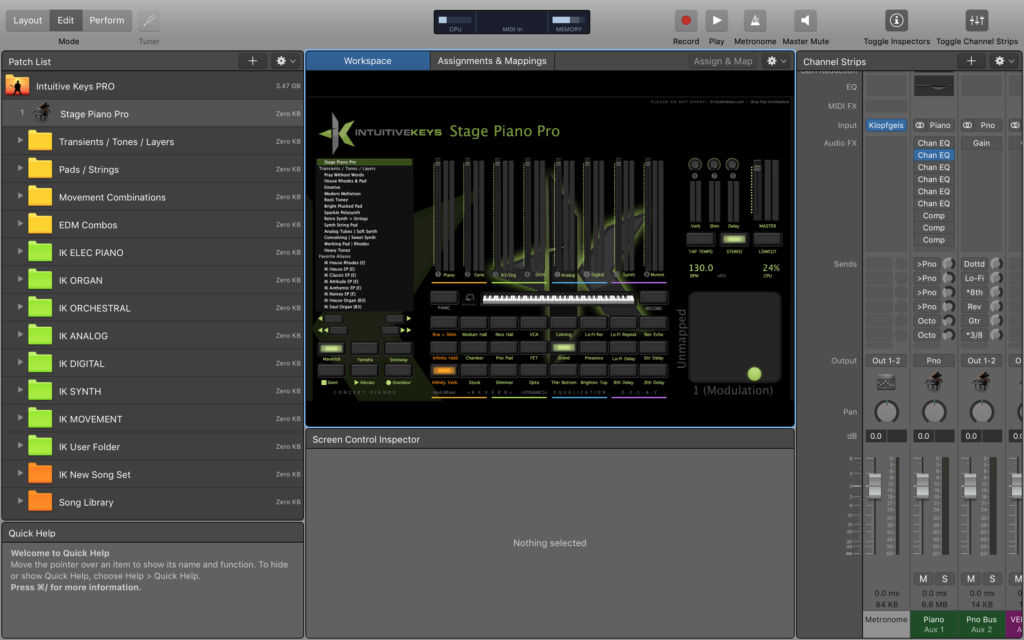
Stage Piano Pro

Selecting the “Stage Piano Pro” patch from the patch menu, effectively solo’s the piano engine. No sound will be produced unless one of the pianos are selected.
In order for the buttons to naturally map to nanoKONTROL2, follow these setup instructions first.
In the example configuration, Native Instruments Grandeur is selected, as well as a “Nice Hall” reverb, a “Shimmer” effect, and a “Brighten Top” EQ. A different piano could be selected / auditioned, which would not change any of the other settings.
The three left-most buttons in orange, has functionality that maps to the mod-wheel. The more mod wheel, the more of that effect. Hopefully this is all “discoverable”, but it does require some time learning your way around all the configurations and effects.
A dedicated “first keys” player covering only pianos would need only this patch to prepare for their set. However, there may be reason to duplicate this “Stage Piano Pro” patch and assign a specific tempo to it, e.g. for each song that uses some kind of tempo-dependant effects, such as the delays. It is also possible to assign the “tap tempo” button to a hardware controller button (tap tempo is not by default assigned to the nanoKONTROL2), and tap-in the tempo in real time. This, however, would produces a “close”, but not precise, tempo. I would much prefer to coordinate and prepare for a specific tempo, particularly if I’m really depending on delays for my piano performance.
The effects returns are available to quickly dial down the amount of reverb, delay, or shimmer as well. Simply rotate the knobs on channel 6 / 7 / 8 respectively if you feel the sounds are too wet. The send amount of each effect can also be modified in the piano buses during preparation.
Stage Piano Pro provides an unparalleled opportunity to quickly craft your piano sound by clicking a few simple buttons. Preparation for covering piano has never been easier!
Synth Engine

The synth engine can be operated at any time, layered with or without the piano, by simply selecting a specific sound in the menu.
But let’s go into edit mode to see more of what’s available to us in the synth engine!
Orange Folders – Combinations
The orange folders are combinations, consisting of layers of individual patches or sounds. There are four folders of combinations. This is the best place to start if you’re eager to get going quickly.
Transients / Tones / Layers is a folder of combinations designed with the “first keys” player in mind. These combinations are designed to be understated and ideally suited to be layered with the piano. From warm relaxed pads suitable for a voice-over, to lush electric piano tones, B3 organ tones, slow string pads, to bright transient dulcimers… this folder consists of gorgeous instruments that compliment the piano. [Video Demo]
The Pads / Strings folder of combinations exists with a dedicated “second keys” player in mind. This extensive collection of pads is no compromise, and can can take up, or create, a lot of space. Each combination responds with a huge emotional range, just by using the mod wheel. Aftertouch provides some kind of emphasis, perhaps adding a subtle filter drive, or even sending to a shimmer verb which can let you create a huge wash at the end of a phrase. Once you work your way through this set, you’ll never again get stuck using one pad for an entire set.
Movement Combinations is a folder of modern sounds that can be used in a variety of situations and genres (to include bluegrass and modern country) to create movement, texture, depth, and beauty. In some cases, movement combinations are paired with a version without the movement component in order to create continuity across sections and help build a song as it progresses. [Video Demo]
EDM Combinations is a folder of combinations exclusively focused on the Electronic Dance Music sound which is it’s own identifiable genre. Music focussed on a younger demographic often employs many of these kinds of sounds as well. [Video Demo]
Green Folders – Patches
The green folders contain patches, consisting of individual sounds or instrument channels that are used to build our combinations. There are seven folders of patches.
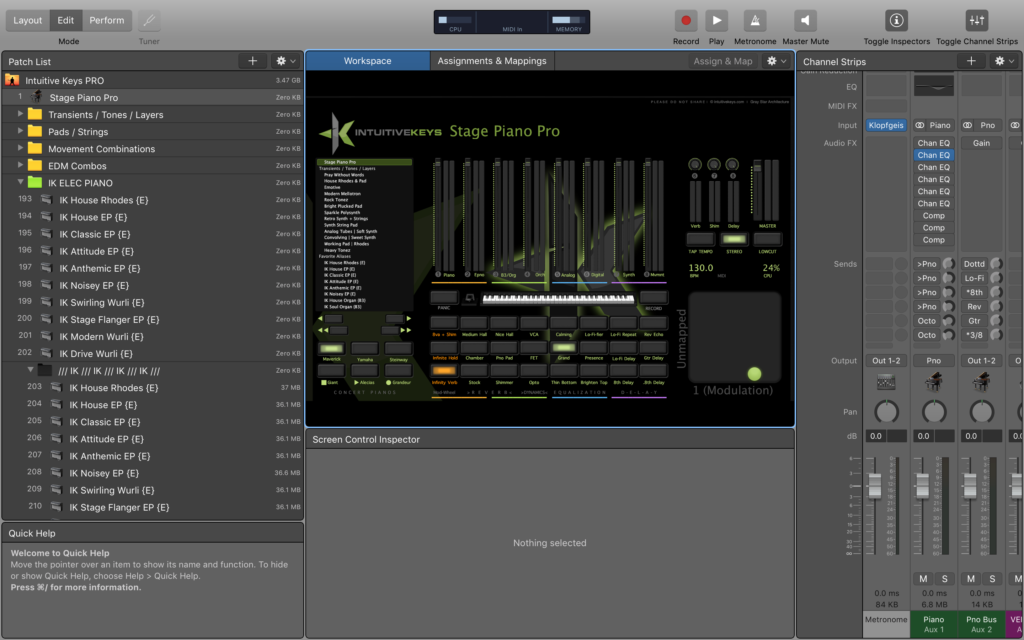
- Electric Pianos
- Organ
- Orchestral
- Analog
- Digital
- Synth
- Movement
Patches are the foundation of this template, and the starting point for you to eventually do you own sound design!
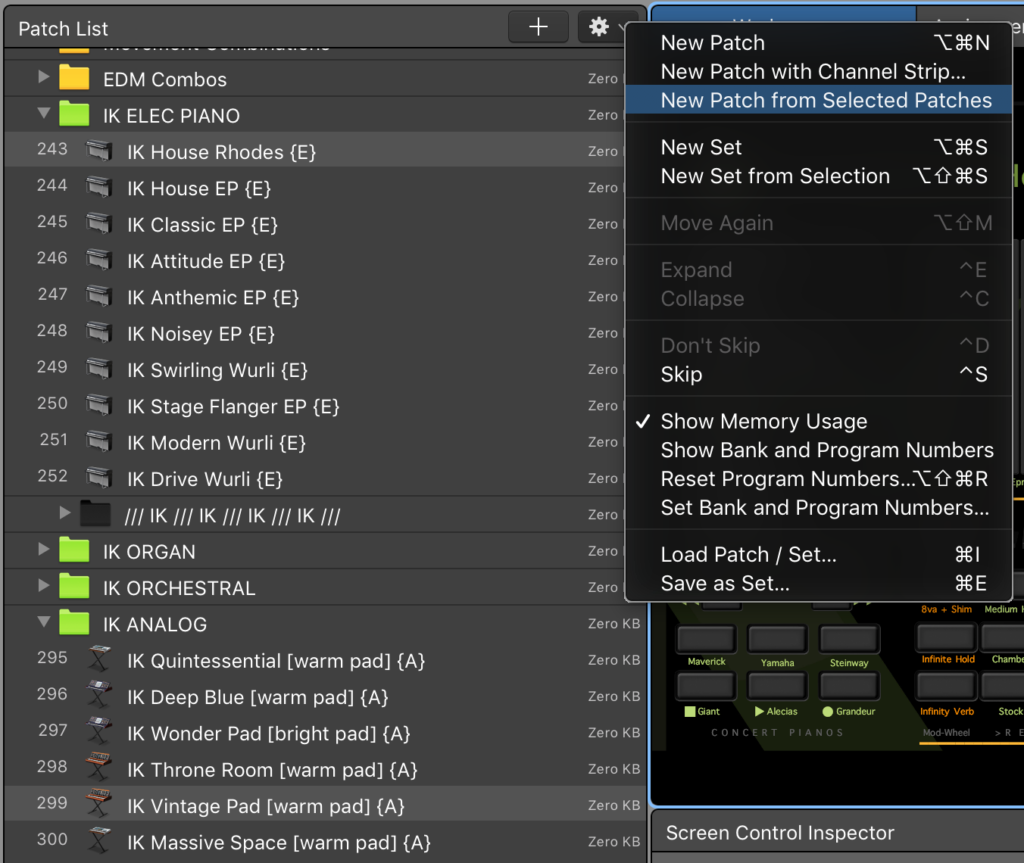
Be sure you know how to use “New Patch from Selected Patches” function (located under the gear), as this quick and handy procedure is the most powerful one you can know! It allows you to take select multiple aliases and easily create a new combination from them, which you can then rename!
Duplicating patches or creating combinations from them is not creating new instances of the sounds as they are aliases, with the actual sounds hidden away in the black folder. Don’t ever go into this black folder, and your template will continue operating like it did on day one, even as you build out your song sets and create new favorite combinations!!
Orange Folders – Song Sets
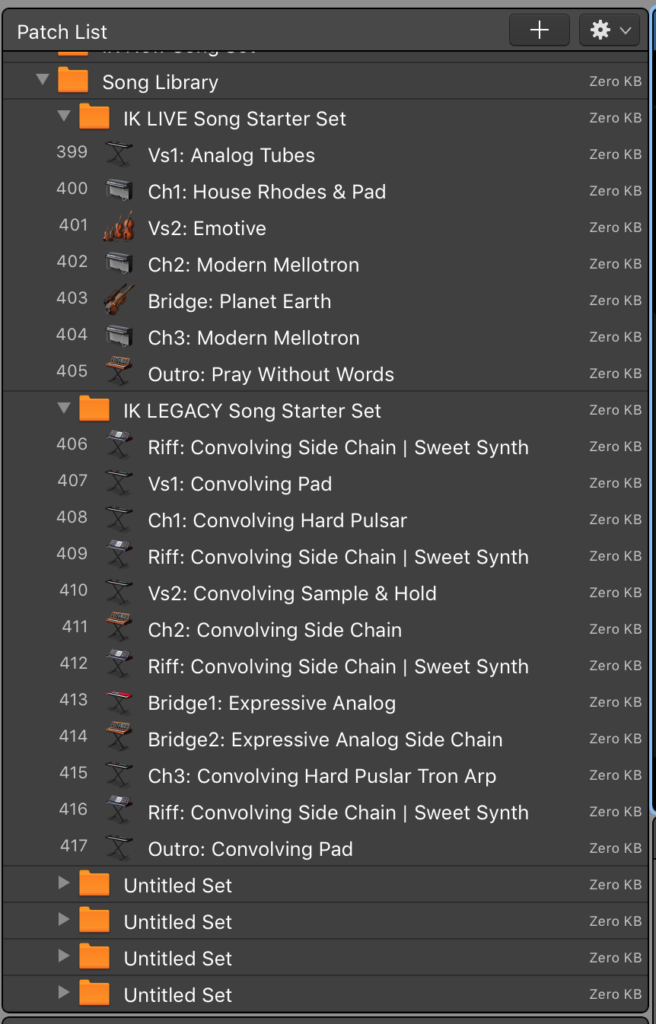
The dark orange folders are for archiving your favorite song sets. They already contain one ore more sample songs to get you started, but they let you archive any songs you have previous prepared as well.
To set a tempo for a song, set the tempo for that song folder, and all the sounds inside will adjust to that tempo.
Don’t forget to save the tempo in the folder! This way you will easily be able to re-use these sounds next time that song comes around again. Since these are all built with aliases, they add no overhead burden to the template. Put another way, you save nothing by deleting these.
So let’s say we’re going to do a new song… I would suggest picking up the video at 14:44 to really understand this.
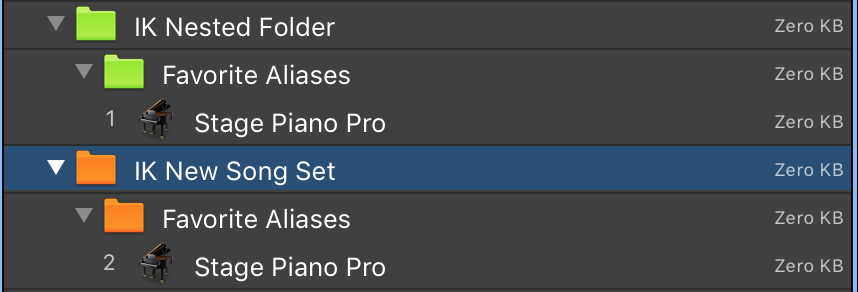
To start, you’ll need to go to your goodies folder in your IK download, and find a “IK New Song Set. patch” which is a nested folder. Drag these into your IK template, and use these to develop and save your own series of combinations, and built out your song sets! Nested folders like these help you really keep yourself organized.
IK leverages the power of aliases and gives you a workflow that keeps your product working as it did on day one!